 Save
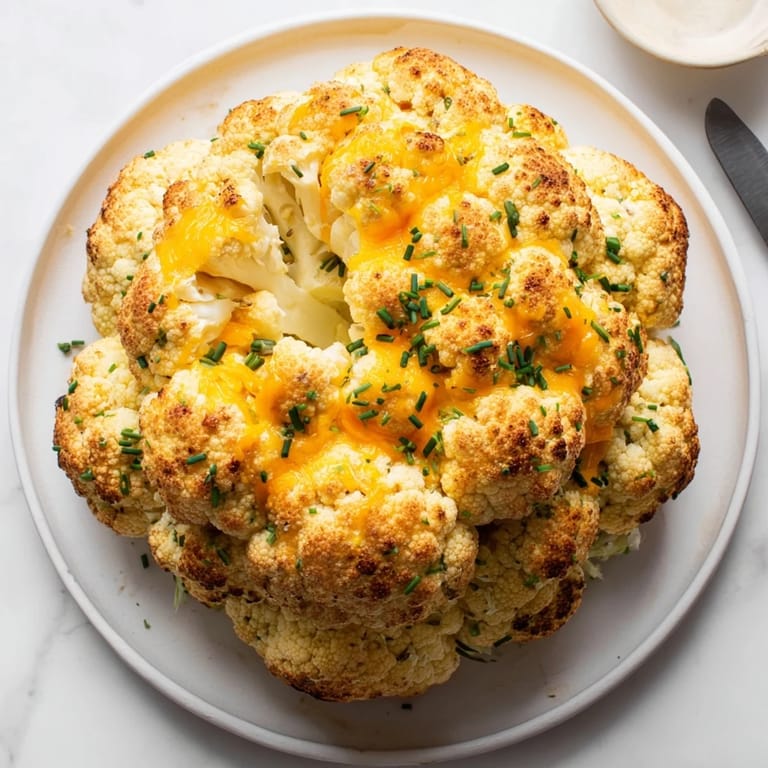
Save The first time I saw a whole roasted cauliflower on a restaurant menu, I honestly thought it was some kind of joke. Who would order a plain vegetable as a main course? Then it arrived at the table, golden and towering with cheese bubbling in every crevice, and my skepticism vanished completely. I've been making it for dinner parties ever since because nothing gets the same reaction from guests. They always lean in when I place it on the table, murmuring about how impressive it looks.
Last winter, my sister dropped by unexpectedly during a snowstorm. I had a cauliflower in the fridge and all the fixings for this recipe, so I convinced her to stay for dinner. We stood in the kitchen watching it through the oven door, steam fogging up the glass as the cheese turned golden brown. She still talks about that meal whenever cauliflower comes up in conversation.
Ingredients
- 1 large whole cauliflower (about 1 kg): Pick one heavy for its size with tight, white florets and no brown spots
- 1 tbsp olive oil: Helps the exterior develop that beautiful golden color and adds subtle richness
- ½ tsp salt: Essential for bringing out cauliflower's natural sweetness
- ¼ tsp black pepper: Freshly cracked adds warmth that cuts through all that cheese
- 150 g cream cheese, softened: The backbone of the filling and creates that velvety texture everyone loves
- 100 g shredded mozzarella cheese: Provides the incredible stretch when you cut into wedges
- 50 g grated Parmesan cheese: Adds that salty depth that keeps the filling from being too mild
- 2 tbsp chopped fresh chives: Brings a fresh onion bite that balances all the richness
- 1 garlic clove, minced: Don't skip this, it makes the cheese filling taste restaurant-quality
- ½ tsp smoked paprika: My secret ingredient for adding complexity without making it spicy
- ¼ tsp ground nutmeg: Just a pinch makes the cheese filling taste surprisingly sophisticated
- 1 tbsp milk: Helps create a smoother, more spreadable filling consistency
- 50 g shredded cheddar cheese: Forms that irresistible golden crust on top
- 2 tbsp breadcrumbs: Use gluten-free if needed and they add the perfect crunchy contrast
- 1 tbsp melted butter: Toss with breadcrumbs so they brown beautifully instead of burning
Tired of Takeout? 🥡
Get 10 meals you can make faster than delivery arrives. Seriously.
One email. No spam. Unsubscribe anytime.
Instructions
- Preheat and Prep Your Workspace:
- Heat your oven to 200°C (400°F) and line a baking tray with parchment paper so cleanup is effortless later.
- Trim the Cauliflower:
- Remove the outer leaves and carefully slice off the very bottom of the stem so the cauliflower sits flat on the tray.
- Blanch the Cauliflower:
- Bring a large pot of salted water to boil, submerge the cauliflower head, and cook 8 to 10 minutes until just tender when pierced.
- Drain Thoroughly:
- Let the cauliflower drain well in the colander and cool slightly so you can handle it without burning your fingers.
- Mix the Cheesy Filling:
- Combine cream cheese, mozzarella, Parmesan, chives, garlic, smoked paprika, nutmeg, and milk until completely smooth.
- Create Pockets for Filling:
- Using a small knife, make deep cuts between the florets and into the center to create space for the cheese mixture.
- Stuff generously:
- Press the cheese filling into every crevice and the center cavity, using your fingers to really work it in deep.
- Season the Exterior:
- Brush the entire outside with olive oil and sprinkle with salt and pepper for flavor that complements the cheesy interior.
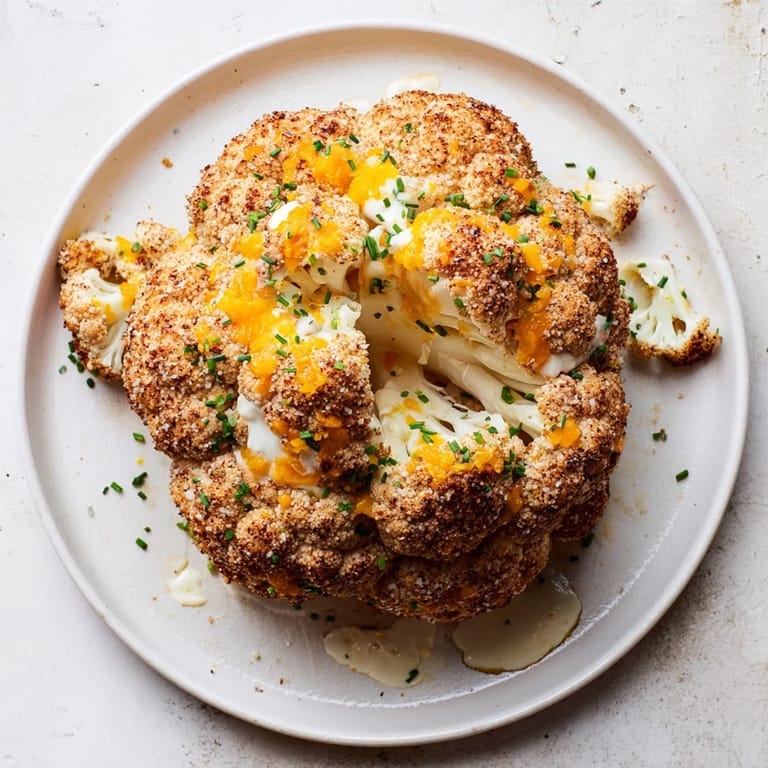
- Add the Crispy Topping:
- Mix cheddar cheese with breadcrumbs and melted butter, then sprinkle evenly over the top for that golden crust.
- Roast Until Golden:
- Bake for 40 to 45 minutes until the cauliflower is tender throughout and the topping is deeply browned and bubbling.
- Rest Before Serving:
- Let the cauliflower rest for 5 minutes so the cheese sets slightly, then slice into wedges like a cake.
 Save
Save This dish has become my go-to when friends announce they are vegetarian. One friend actually asked for the recipe before she even finished her first slice, which I consider the highest possible compliment. There is something about the presentation that makes people feel special and taken care of.
Make It Your Own
I have found that adding chopped sun-dried tomatoes to the cheese filling creates the most incredible contrast of flavors. The tangy brightness cuts through all that rich creaminess in a way that keeps every bite interesting. Sometimes I will add sautéed mushrooms too if I want to make it even more substantial.
Serving Suggestions
A crisp green salad with an acidic vinaigrette is the perfect accompaniment to balance all that cheese. I also love serving roasted vegetables on the side or some crusty bread to soak up any melted cheese that escapes. The portion size is generous enough that this can truly stand as a main dish.
Storage and Reheating
Leftovers keep surprisingly well in an airtight container in the refrigerator for up to three days. Reheat wedges in a 180°C (350°F) oven until heated through and the cheese is bubbling again. The texture will be slightly softer but the flavors will have developed even more depth.
- Wrap wedges individually for the easiest meal prep lunches
- Never microwave this or you will lose the crispy topping completely
- It actually freezes quite well if you want to make one ahead for a busy week
 Save
Save There is something deeply satisfying about serving a vegetable that feels like a celebration rather than an afterthought. Watching people cut into that first wedge and seeing the cheese stretch between the plate and their fork never gets old.
Recipe FAQs
- → How do I know when the cauliflower is done cooking?
The cauliflower is ready when it's golden brown on top, the cheese is bubbling, and a knife inserted into the center meets no resistance. The florets should be tender but not mushy, typically after 40–45 minutes of roasting at 200°C (400°F).
- → Can I prepare this ahead of time?
Yes, you can blanch the cauliflower and prepare the cheese filling up to a day in advance. Store them separately in the refrigerator. When ready to serve, stuff, top, and roast. The dish is best served fresh from the oven for optimal texture and flavor.
- → What can I use instead of cream cheese?
You can substitute cream cheese with an equal amount of ricotta cheese blended until smooth, or use a mixture of Greek yogurt and shredded cheese for a lighter version. Both alternatives will still provide a creamy, flavorful filling.
- → Is this suitable for gluten-free diets?
Absolutely. Simply use gluten-free breadcrumbs for the topping, and ensure all other ingredients are certified gluten-free. The dish is naturally vegetarian and can be made completely gluten-free without compromising flavor or texture.
- → How should I serve this stuffed cauliflower?
Slice the roasted cauliflower into wedges like a cake and arrange on a platter. It pairs beautifully with a crisp green salad, roasted vegetables, or crusty bread. Leftovers reheat well in a 180°C (350°F) oven for about 15 minutes until warmed through.
- → Can I add other ingredients to the cheese filling?
Certainly. Chopped sun-dried tomatoes, sautéed mushrooms, crispy bacon bits, or spinach all work wonderfully in the filling. Just keep the total volume similar so the cauliflower can accommodate the mixture without overflowing.