 Save
Save My daughter came home from school one evening with a constellation chart tucked under her arm, utterly convinced that understanding Pisces would unlock some cosmic secret about her personality. We spent that night sprawled on the kitchen table with hot chocolate, tracing the two fish connected by a cosmic string, and I thought—why not turn this into something we could actually eat? These delicate sugar cookies became our edible map of the night sky, each one a tiny celebration of that curiosity.
I'll never forget watching my sister's face when she bit into one of these at her birthday dinner—she expected just another sugar cookie, but the way the royal icing shattered between her teeth, the buttery dough dissolving underneath, made her pause and actually taste it instead of just eating it. That moment taught me that presentation isn't about showing off; it's about giving people permission to slow down and notice what they're experiencing.
Ingredients
- All-purpose flour (2 1/2 cups): The foundation that keeps these cookies tender rather than tough—don't sift unless you're feeling precise, but do measure by weight if your scale is handy because volume can be deceptively inconsistent.
- Unsalted butter (3/4 cup): Softened to room temperature so it creams into that cloud-like texture that makes the dough rise beautifully in the oven.
- Granulated sugar (1 cup): Works alongside the butter to create structure and that subtle crunch at the edges that contrasts with the tender center.
- Egg (1 large): Binds everything together and adds richness without making the cookies cake-like or dense.
- Pure vanilla extract (2 teaspoons): A small amount that whispers in the background rather than shouts, letting the buttery sweetness be the main event.
- Baking powder (1/2 teaspoon): Just enough lift to keep them from spreading into thin wafers, but not so much that they puff up like biscuits.
- Salt (1/4 teaspoon): The quiet amplifier that makes every other flavor pop without tasting salty itself.
- Powdered sugar (2 cups) and meringue powder (2 tablespoons): Combined with water, these create royal icing that hardens into that glassy finish perfect for piping fine constellation lines without them bleeding or sagging.
- Gel food coloring (navy, white, gold, silver): Gel holds its color better than liquid coloring and won't thin out your icing the way water-based dyes would.
- Edible pearls or nonpareils: The final touch that catches light and makes your stars feel dimensional and special.
Tired of Takeout? 🥡
Get 10 meals you can make faster than delivery arrives. Seriously.
One email. No spam. Unsubscribe anytime.
Instructions
- Prepare Your Dry Ingredients:
- Whisk flour, baking powder, and salt together in a medium bowl and set aside—this ensures the leavening agent is evenly distributed so every cookie rises the same way.
- Cream Butter and Sugar Into Clouds:
- Using an electric mixer, beat softened butter with granulated sugar for about two to three minutes until the mixture is noticeably lighter in color and fluffy enough to hold soft peaks. This incorporates air that will make your cookies tender instead of dense.
- Add the Egg and Vanilla:
- Beat in the egg and vanilla extract until you can't see any streaks of egg white—this usually takes about a minute of mixing. The mixture should look smooth and slightly mousse-like.
- Combine Wet and Dry:
- Gradually add your flour mixture to the butter mixture while mixing on low speed, stopping as soon as you don't see white streaks of flour. Overmixing develops gluten and makes cookies tough, so resist the urge to keep the mixer running.
- Chill the Dough:
- Divide the dough in half, flatten each portion into a disk, wrap tightly in plastic wrap, and refrigerate for at least an hour. Cold dough doesn't spread as much and holds fine details better when you cut out your shapes.
- Preheat and Prepare Baking Sheets:
- Set your oven to 350°F and line baking sheets with parchment paper—this prevents sticking and ensures even browning on the bottom without needing to flip them.
- Roll and Cut With Intention:
- On a lightly floured surface, roll one disk of dough to about a quarter-inch thickness and cut out circles or your preferred shapes. If the dough gets too warm and sticky, pop it back in the fridge for five minutes.
- Space Them Properly:
- Place cut cookies about an inch apart on your prepared sheets—they won't spread much, but this spacing prevents any accidental touching in the oven.
- Bake Until Golden at the Edges:
- Bake for eight to ten minutes until the edges are just barely golden but the centers still look slightly underbaked. They'll continue cooking on the hot pan after you remove them, so don't wait until they're fully firm.
- Cool Completely:
- Let cookies cool on the baking sheet for about two minutes, then transfer to a wire rack. They need to be completely cool and firm before icing, or the royal icing will melt right off.
- Prepare Royal Icing:
- Whisk together sifted powdered sugar, meringue powder, and three tablespoons of water until the mixture reaches stiff peaks—you should be able to scoop it with a spoon and have it hold its shape. Add water one tablespoon at a time if you need a thinner consistency for piping.
- Tint Your Night Sky:
- Divide your white royal icing into portions and tint one larger portion with navy blue gel coloring for the cookie base, leaving some white for piping stars and constellation lines. Mix well until the color is even.
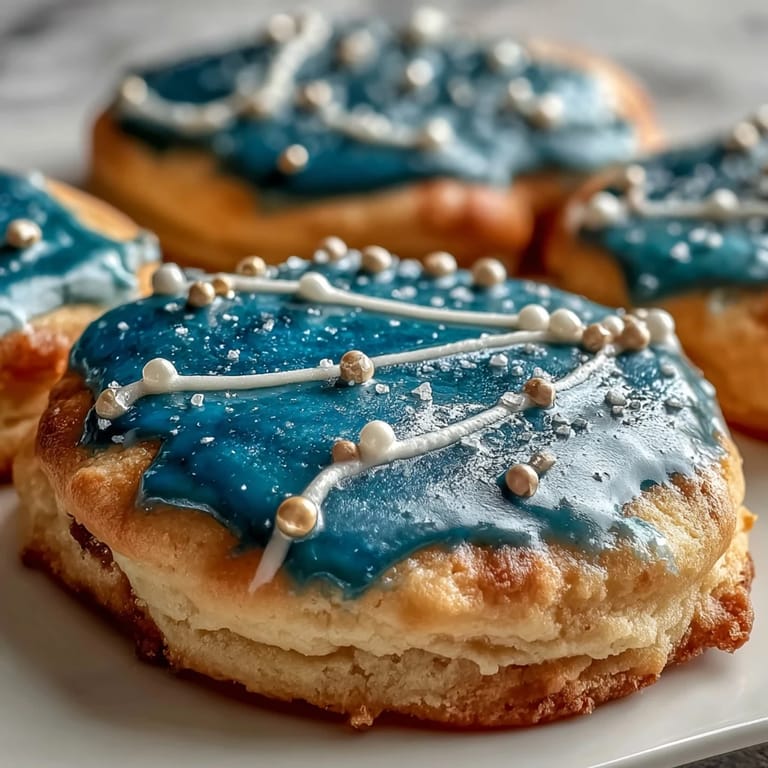
- Base Coat With Blue:
- Spread or pipe a thin layer of navy blue icing across each cooled cookie and let it set for about fifteen minutes until it's no longer tacky. This creates your night sky canvas.
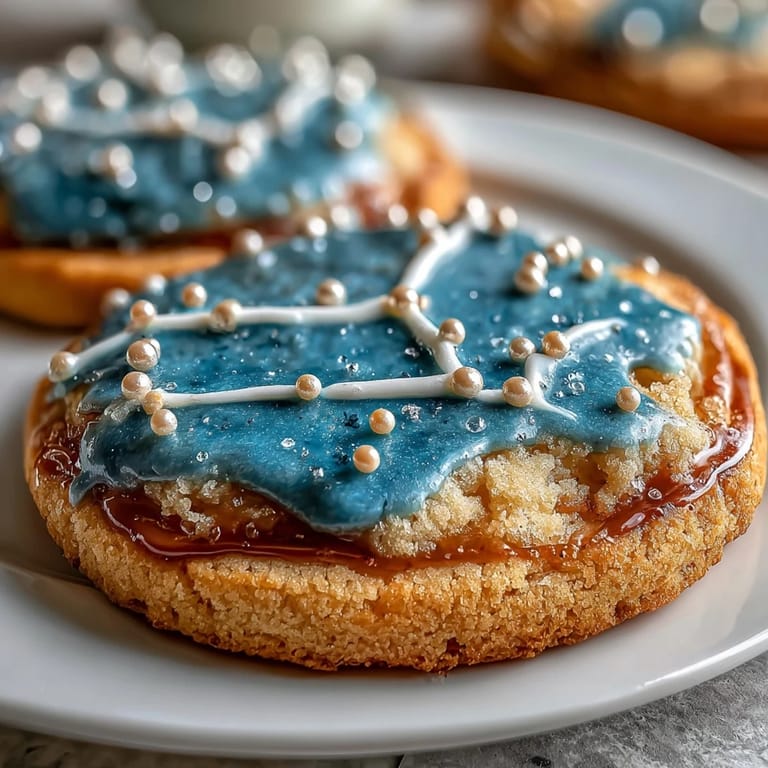
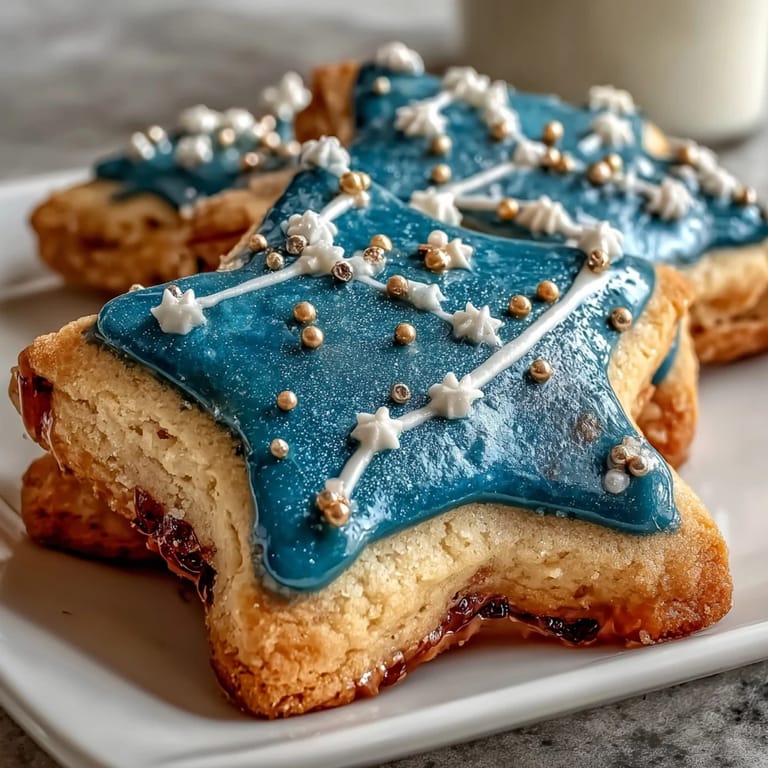
- Pipe the Constellation:
- Using a piping bag fitted with a fine tip and filled with white icing, carefully pipe the Pisces constellation—two fish with a connecting cord—onto your blue-frosted cookies. Reference an actual constellation chart so your lines feel authentic rather than random.
- Add Stars While Icing is Wet:
- While the white icing is still slightly wet, carefully place edible pearls or nonpareils at each star point of your constellation. The wet icing acts like glue.
- Final Touches:
- Once the white icing is set, you can add tiny flecks of gold or silver luster dust with a small brush, or pipe tiny accents between the stars to make your night sky feel more magical and dimensional.
- Let Everything Dry:
- Allow all cookies to dry completely at room temperature for at least a few hours or overnight before stacking them for storage. This prevents any icing transfer and ensures they stay beautiful.
 Save
Save There's something quietly magical about sitting down with a cookie and actually tracing the constellation with your finger before taking a bite, turning a dessert into a small moment of stargazing. My daughter still keeps one of these in a little box on her nightstand, not because it's edible anymore, but because it reminds her that we made the sky taste like butter and sugar that night.
Why Constellations Make Better Decorations Than You'd Think
When I first decided to decorate these cookies with constellation designs, I thought I'd need to be a professional artist to pull it off, but constellations are almost forgiving by design—they're literally just dots connected by lines, which means wobbly piping actually adds character instead of looking like a mistake. The beauty of the Pisces constellation is that it has flowing, curved lines that feel organic rather than geometric, so even if your white icing wanders a tiny bit off its intended path, it just looks more cosmic and less controlled.
The Difference Between Good Royal Icing and Frustrating Royal Icing
I spent years making royal icing that either stayed tacky forever or crusted over before I could finish decorating, and the turning point came when I finally invested in meringue powder instead of trying to use raw egg whites or trying to whip regular powdered sugar into submission. Meringue powder stabilizes the mixture in a way that makes it predictable and reliable, and once you get your water ratio right—which honestly takes one trial batch to figure out for your specific powdered sugar brand—everything else just flows.
Customization Ideas That Actually Work
Once you master the basic cookie and icing technique, the possibilities expand beyond just constellations—you could create the entire zodiac wheel for a party, pipe different constellations for each guest as place cards, or even create a seasonal set of cookies showing constellations visible in different times of year. The sky really is your limit, and the cookie itself becomes almost secondary to the story you're telling with the decorations.
- Try other zodiac constellations like Orion, Ursa Major, or Leo by printing out a reference image and lightly sketching it on the blue icing with a toothpick before piping.
- Swap the blue base for deep purple, midnight black, or even silver for a completely different mood while keeping the same constellation design.
- Package these as gifts with a small constellation chart attached so people know exactly which stars they're eating.
 Save
Save These cookies prove that dessert can be both beautiful and genuinely delicious, and that the effort you put into making something thoughtful shows in ways beyond just how it tastes. Whenever someone asks for the recipe now, I hand it over gladly, knowing that they're not just getting instructions for sugar cookies—they're getting permission to slow down and turn baking into stargazing.
Recipe FAQs
- → What ingredients are used for the cookie base?
The base includes all-purpose flour, baking powder, salt, unsalted butter, granulated sugar, an egg, and vanilla extract.
- → How is the royal icing prepared and tinted?
Powdered sugar and meringue powder are whisked with water until stiff peaks form, then tinted navy blue for the background and left white for constellation details.
- → What technique is used to depict the Pisces constellation?
White icing is piped for lines and dots representing stars, while edible gold or silver pearls mark star points on the cookies.
- → Can the cookies be made in advance?
Yes, chilling the dough before baking enhances texture, and decorated cookies should dry completely before storing.
- → Are there any allergen considerations?
The cookies contain wheat, eggs, dairy, and meringue powder, which may contain egg; check decorations and colorings for allergens.
- → What tools are needed for decorating?
Piping bags with fine tips, a rolling pin, cookie cutters, and optionally a food-safe brush for details.