 Save
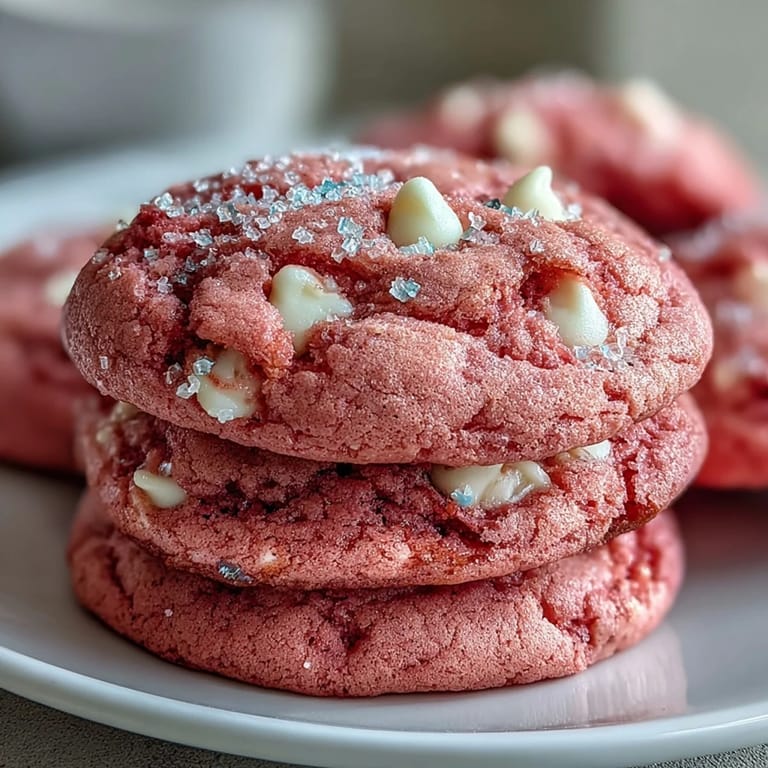
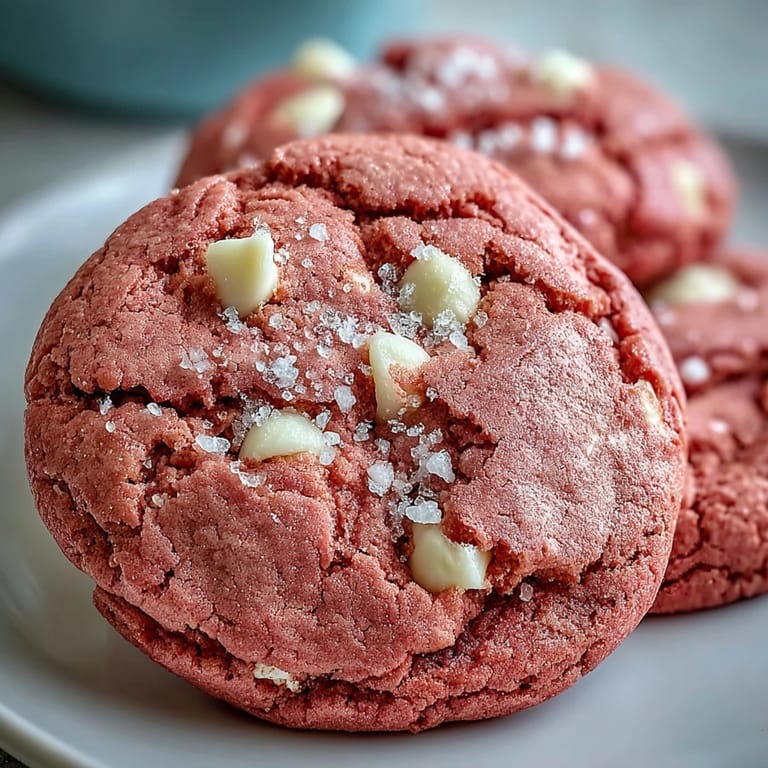
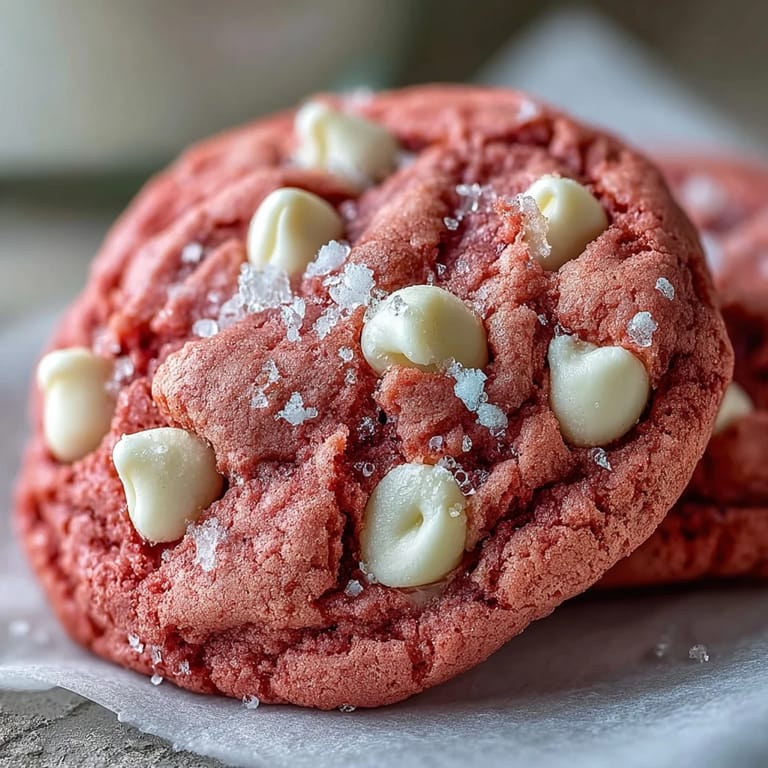
Save My neighbor handed me a bottle of pink gel food coloring one afternoon with a mischievous grin, insisting I had to try something bold. I wasn't sure what to do with it until I spotted a half-empty bag of white chocolate chips in my pantry. The idea hit me all at once: soft, pillowy cookies with a shocking pink center and sweet white chocolate pockets. I mixed the dough that same evening, and when I pulled the first batch from the oven, the kitchen smelled like vanilla and butter, and the cookies looked like they belonged at a party I hadn't planned yet.
I brought a tin of these to a potluck once, and they disappeared before the main course even came out. A friend asked if I'd used cake mix, convinced there was no way cookies could be that vibrant and soft from scratch. I told her it was just butter, sugar, and a little bit of courage with the food coloring. She laughed and took three more before anyone else could reach the tin.
Ingredients
- All-purpose flour: The foundation of the dough, providing structure while keeping the cookies tender when measured correctly.
- Baking powder and baking soda: This duo creates the perfect lift and soft texture without making the cookies cakey.
- Salt: Just enough to balance the sweetness and bring out the vanilla flavor.
- Unsalted butter: Softened to room temperature, it creams beautifully and gives the cookies their rich, melt-in-your-mouth quality.
- Granulated sugar: Sweetens the dough and helps create those slightly crisp edges that contrast with the soft centers.
- Egg: Binds everything together and adds moisture, making each cookie tender.
- Vanilla extract: A must for that warm, familiar sweetness that makes the whole kitchen smell like comfort.
- Pink gel food coloring: The secret to that bold, vibrant hue without adding extra liquid that would change the dough texture.
- White chocolate chips: They melt just slightly during baking, creating sweet, creamy pockets throughout each cookie.
Tired of Takeout? 🥡
Get 10 meals you can make faster than delivery arrives. Seriously.
One email. No spam. Unsubscribe anytime.
Instructions
- Whisk the dry ingredients:
- In a medium bowl, combine the flour, baking powder, baking soda, and salt until evenly mixed. Set this aside so it's ready when you need it.
- Cream the butter and sugar:
- Beat the softened butter and sugar together in a large bowl for about 2 to 3 minutes until the mixture turns pale and fluffy. This step is where the cookies get their tender crumb.
- Add the egg and flavorings:
- Mix in the egg and vanilla extract until smooth, then add the pink gel food coloring. Keep mixing until the color is even and vibrant throughout the dough.
- Combine wet and dry:
- Gradually add the flour mixture to the wet ingredients on low speed, mixing just until no streaks remain. Overmixing will make the cookies tough, so stop as soon as it comes together.
- Fold in the white chocolate:
- Use a spatula to gently stir in the white chocolate chips, making sure they're evenly distributed. This keeps the dough tender and the chips intact.
- Chill the dough:
- Cover the bowl with plastic wrap and refrigerate for 30 minutes. This step helps the cookies hold their shape and prevents them from spreading too much in the oven.
- Preheat and prep:
- Set your oven to 350 degrees F and line two baking sheets with parchment paper. Having everything ready makes the baking process smooth and quick.
- Scoop the dough:
- Use a tablespoon or cookie scoop to portion out the dough, placing each ball about 2 inches apart on the prepared sheets. They'll spread just enough as they bake.
- Bake until set:
- Slide the sheets into the oven and bake for 10 to 12 minutes, just until the edges look set but the centers still seem a little soft. They'll firm up as they cool, so don't overbake.
- Cool and enjoy:
- Let the cookies rest on the baking sheets for 5 minutes, then transfer them to a wire rack. They'll finish setting and be ready to eat once they've cooled completely.
 Save
Save One evening, my daughter helped me scoop the dough onto the baking sheets, and she kept sneaking bites of the raw dough between scoops. When the cookies came out of the oven, she declared them magic because they stayed so pink and soft. We ate two each while they were still warm, the white chocolate melting on our fingers, and she said they tasted like happiness looked.
Storage and Freshness
These cookies stay soft and chewy for up to a week when stored in an airtight container at room temperature. I like to tuck a slice of bread in with them to keep the moisture locked in, a trick my grandmother taught me years ago. If you want to freeze them, layer the cooled cookies between sheets of parchment paper and seal them in a freezer bag for up to three months. They thaw quickly on the counter and taste just as fresh as the day you baked them.
Flavor Variations
I've tried adding half a teaspoon of almond extract to the dough, and it gives the cookies a subtle, bakery-style sweetness that pairs beautifully with the white chocolate. A few drops of rose water can make them feel fancy and floral, perfect for a bridal shower or garden party. You can also swap the white chocolate chips for dark chocolate or even crushed freeze-dried strawberries if you want a fruity twist.
Serving Suggestions
These cookies are stunning on their own, but I've also sandwiched them with cream cheese frosting for a dessert that feels indulgent without much extra effort. They look gorgeous on a platter with fresh berries or alongside a tall glass of cold milk. For a party, you can press extra white chocolate chips on top before baking to make them even more eye-catching.
- Dust the cooled cookies lightly with powdered sugar for a snow-kissed look.
- Serve them with vanilla ice cream for an easy but impressive dessert.
- Wrap individual cookies in clear cellophane tied with ribbon for sweet homemade gifts.
 Save
Save Every time I bake these, someone asks for the recipe, and I'm always happy to share it. They're proof that a little color and a lot of butter can turn an ordinary afternoon into something worth remembering.
Recipe FAQs
- → Why do I need to chill the cookie dough?
Chilling the dough for 30 minutes helps the cookies hold their shape during baking and prevents excessive spreading. The cold dough also creates a better texture with softer centers and defined edges.
- → Can I use liquid food coloring instead of gel?
Gel food coloring is recommended because it provides vibrant color without adding extra liquid to the dough. Liquid coloring may alter the cookie texture and require less intense color results.
- → How do I know when the cookies are done baking?
The cookies are ready when the edges are set but the centers still look slightly soft and underbaked. They will continue to firm up as they cool on the baking sheet for 5 minutes.
- → Can I make these cookies ahead of time?
Yes, you can prepare the dough and refrigerate it for up to 3 days before baking. Baked cookies store in an airtight container for up to 1 week at room temperature.
- → What can I substitute for white chocolate chips?
You can use milk chocolate chips, dark chocolate chips, or semi-sweet chocolate chips. Chopped white chocolate bars also work well and create melty pockets throughout the cookies.
- → How do I make these cookies gluten-free?
Replace the all-purpose flour with a 1:1 gluten-free flour blend. Ensure your baking powder and other ingredients are certified gluten-free if needed for severe allergies.