 Save
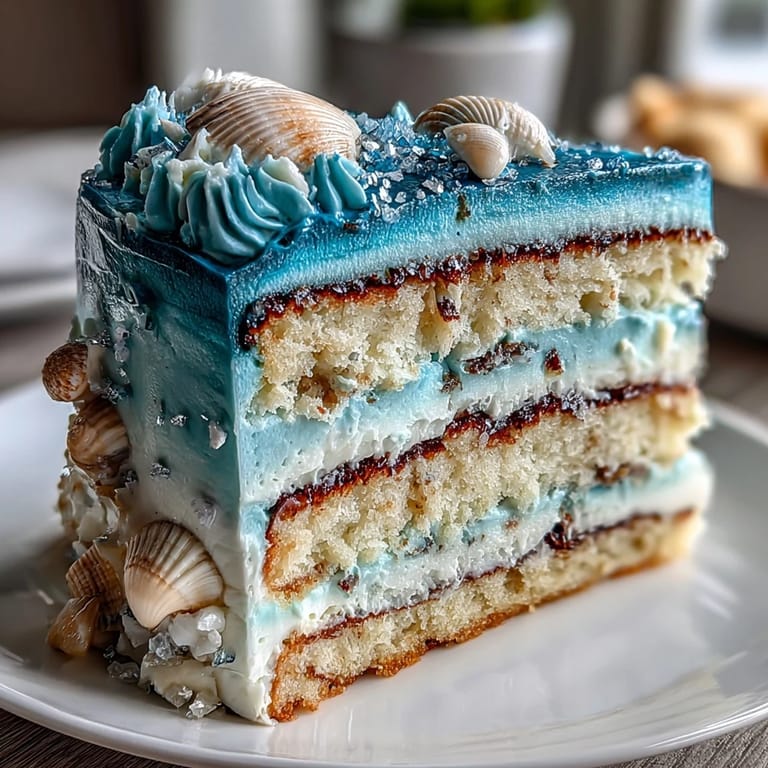
Save My friend called me in a panic the night before her Pisces birthday—she wanted a cake that felt like the ocean, something ethereal and dreamy that matched her water sign energy. I'd never attempted an ombre frosting before, but there was something about the challenge that excited me, so I said yes before I could second-guess myself. By the next afternoon, three layers of vanilla sponge were cooling on my racks, and I was standing at my counter with four bowls of buttercream and an intimidating array of blue gel colors. What started as an ambitious idea became one of those kitchen moments where everything clicked.
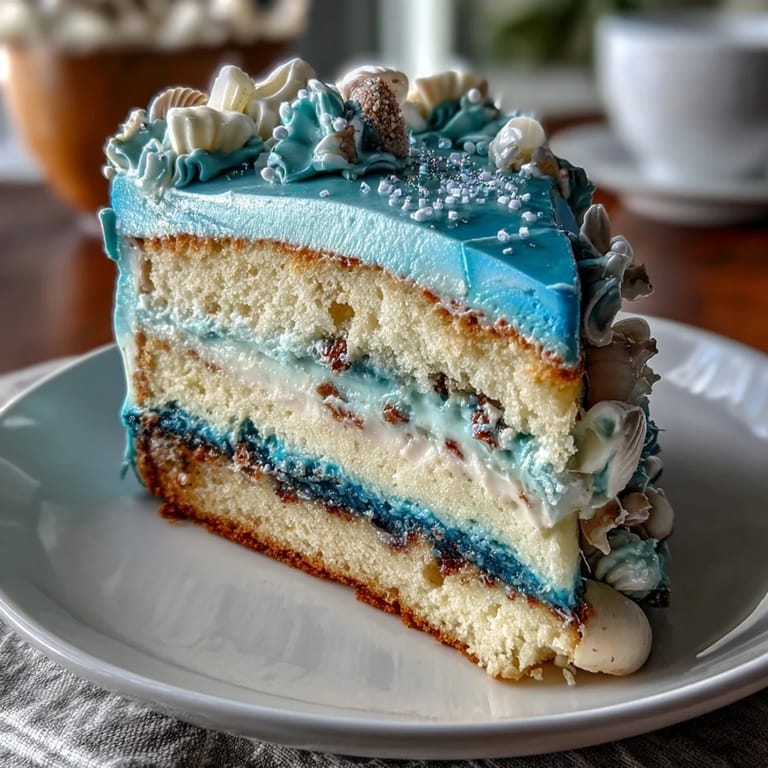
Watching her face when she saw the finished cake—that moment of pure joy when she realized someone had literally baked the ocean for her birthday—made every careful stroke with the offset spatula worth it. She cut into it and found perfectly moist layers that didn't crumble, and the frosting held its beautiful gradient without looking artificial. That's when I knew this recipe wasn't just pretty; it was genuinely delicious and reliable enough to become a tradition.
Ingredients
- All-purpose flour (2 ½ cups): Measure by weight if possible—scooping directly from the bag compacts it and throws off the ratio, which I learned the hard way when my first attempt came out dense.
- Baking powder (2 ½ tsp): This is your lift; don't skimp or substitute with baking soda without adjusting the recipe, or you'll end up with a flat pancake.
- Unsalted butter (¾ cup for cake, 1 ½ cups for frosting): Room temperature is non-negotiable—cold butter won't cream properly, and your cake will be heavy.
- Granulated sugar (1 ¾ cups): The sweetness and structure of the cake depend on this; it also helps aerate when creamed with butter.
- Eggs (4 large, room temperature): Cold eggs won't emulsify smoothly into the butter mixture, resulting in a separated, broken batter.
- Pure vanilla extract (1 tbsp for cake, 2 tsp for frosting): Invest in real vanilla—imitation extract tastes thin and won't give you that warm, complex flavor.
- Whole milk (1 cup for cake, ¼ cup for frosting): Room temperature milk blends seamlessly into the batter without shocking the temperature of the mixture.
- Powdered sugar (6 cups, sifted): Sifting removes lumps and aerates the frosting, preventing gritty texture that's impossible to hide.
- Blue gel food coloring: Gel coloring is thicker and won't thin out your frosting like liquid food coloring does, which is essential for an ombre effect.
Tired of Takeout? 🥡
Get 10 meals you can make faster than delivery arrives. Seriously.
One email. No spam. Unsubscribe anytime.
Instructions
- Prep your pans and gather your temperature-sensitive ingredients:
- Preheat the oven to 350°F and line three 8-inch round pans with parchment paper—this prevents sticking and makes layer removal smooth. Set out your eggs, butter, and milk 30 minutes before starting so they reach room temperature, which sounds fussy but genuinely makes the difference between silky batter and grainy cake.
- Combine your dry ingredients:
- Sift flour, baking powder, and salt together into a medium bowl, then set aside. This aeration through sifting helps distribute the leavening agents evenly and prevents dense pockets in your finished cake.
- Cream butter and sugar into fluffy clouds:
- Beat softened butter and sugar in a large bowl for 3-4 minutes until the mixture looks pale, fluffy, and noticeably lighter than when you started. You're incorporating air into the butter, which helps the cake rise and keeps it tender.
- Add eggs one at a time, then vanilla:
- Drop each egg in individually and beat well after each addition before adding the next one. This gradual incorporation prevents the batter from separating and ensures even distribution.
- Alternate between dry mixture and milk:
- Add one-third of the flour mixture, beat until just combined, then add half the milk, then another third of flour, the remaining milk, and finally the last of the flour. Beginning and ending with flour prevents the batter from becoming too wet at the end.
- Divide batter and bake:
- Distribute batter evenly among the three pans and smooth the tops with a spatula so they bake uniformly. Bake for 25-30 minutes until a toothpick inserted in the center comes out clean with just a few moist crumbs.
- Cool with patience:
- Let cakes sit in their pans for 10 minutes to set slightly, then turn out onto wire racks to cool completely. Frosting warm cake will melt the buttercream and create a greasy mess.
- Prepare your ombre frosting base:
- Beat softened butter until creamy, then gradually add sifted powdered sugar, beating well after each addition to prevent lumpy streaks. Add vanilla and salt, then milk a little at a time until you reach a smooth, spreadable consistency.
- Create your color gradient:
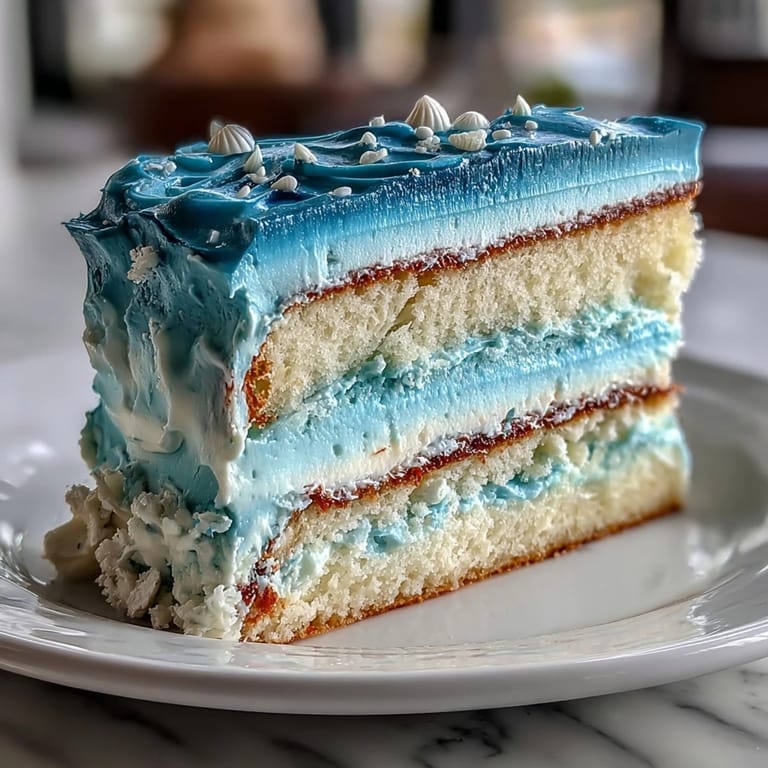
- Divide frosting into four bowls and tint each with blue gel coloring, starting with the palest sky-blue in the first bowl and deepening the shade in each subsequent bowl until the fourth is a rich ocean blue. Keep a mental note of which is which, or mark the bowls, because once you start frosting it's easy to lose track.
- Build and layer the cake:
- Place the first cake layer on your serving plate and spread a thin, even layer of the lightest frosting on top. Repeat with the second layer, then top with the final layer.
- Frost the sides and top with intention:
- Using an offset spatula, start frosting the top and sides of the cake with your lightest blue shade. Gradually introduce the darker shades as you move down the sides, blending and feathering where colors meet for a seamless ombre effect.
- Add the finishing touches:
- Decorate with white chocolate seashells, edible glitter, or blue and silver sprinkles while the frosting is still soft enough for them to stick. This is where you get to be creative and make the cake your own.
- Chill before serving:
- Refrigerate the finished cake for at least 30 minutes so the frosting sets and the layers hold their shape when you slice it. Clean slices matter more than you'd think when you're serving something this beautiful.
 Save
Save There's something magical about the moment when a layer cake comes together under your hands—when you step back and see the gradient flowing seamlessly from pale to deep blue, and you realize you've created something that's genuinely beautiful and tastes incredible. That's the feeling I want you to have with this cake.
Why Room Temperature Matters More Than You Think
I used to skip the step of letting ingredients come to room temperature because it felt like unnecessary fussing, until I baked two cakes side by side—one with cold ingredients and one with room temperature ones. The warm-ingredient cake was visibly lighter, more tender, and rose higher in the oven because the ingredients emulsified properly instead of fighting each other. Cold eggs and milk in warm butter create tiny pockets of separation that trap air unevenly, resulting in a dense, almost gummy crumb. Room temperature is where science and patience intersect, and it's worth the wait.
The Secret to Seamless Ombre Frosting
The key to making your ombre look polished rather than splotchy is blending where colors meet, and you do this by layering your shades rather than applying them in distinct bands. Start with your lightest shade covering the entire exterior, then use a clean (or cleaned) offset spatula to gently drag the next shade over part of that first layer, letting them merge together on the cake. It's less about perfect precision and more about gentle, overlapping strokes that create a gradient rather than a stripe. The deeper blues should concentrate toward the bottom and sides, with the palest shades at the very top, mimicking how ocean water gets darker as it deepens.
Storage and Keeping This Cake Fresh
Buttercream-frosted cakes actually improve after a day or two in the refrigerator—the flavors meld, the frosting firms up beautifully, and the cake stays moist. Store it in an airtight container or covered well with plastic wrap to prevent it from absorbing odors or drying out.
- Room temperature slices will taste better than cold ones, so take the cake out of the fridge 15 minutes before serving if you have time.
- This cake keeps well for up to 4 days refrigerated, or you can freeze unfrosted cake layers for up to a month.
- If decorating with fresh elements like white chocolate, add them the morning of serving rather than days ahead.
 Save
Save This cake isn't just about celebrating a Pisces—it's about creating something with your hands that makes people feel seen and celebrated. Bake it with intention, and it will taste like love.
Recipe FAQs
- → How do I achieve the ombre effect in frosting?
Divide frosting into several portions, tint each with varying intensities of blue gel food coloring, then apply layers from light to dark while blending edges smoothly.
- → What’s the best way to keep the cake moist?
Brushing the vanilla sponge layers with simple syrup before frosting helps retain moisture and enhances softness.
- → Can I prepare the cake ahead of time?
You can bake the layers in advance and store them wrapped in the fridge. Allow cakes to reach room temperature before frosting for best results.
- → What tools ensure even cake layers?
Using three 8-inch round pans with parchment lining guarantees uniform layers that bake evenly without doming.
- → How to decorate with white chocolate seashells?
Place the seashells and edible glitter on the frosted surface gently; chilled frosting helps decorations stay in place.
- → Is there a recommended pairing with this cake?
A sparkling Moscato or light herbal teas complement the sweetness and vanilla flavor beautifully.